スクロールバーを利用する方法
今日はScrollViewについて紹介します。
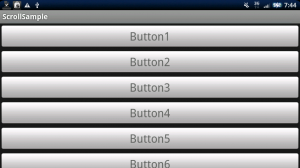
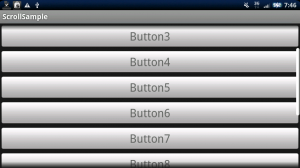
Androidアプリケーションを作っていると以下の写真のように、
画面サイズが足りずに表示されない領域が出てくる場合があります。
この場合、ScrollViewを使ってスクロールバーで画面を
移動できるようにすると良いでしょう。
詳細は以下からどうぞ。
ScrollViewを使う場合、レイアウトファイル(/res/layout/main.xml)は以下のようになります。
LinearLayoutが子になる形でScrollViewを配置します。
<ScrollView xmlns:android="http://schemas.android.com/apk/res/android"
    android:layout_width="fill_parent"
    android:layout_height="wrap_content">
    <LinearLayout
        android:orientation="vertical"
        android:layout_width="fill_parent"
        android:layout_height="wrap_content">

	<Button
	    android:layout_width="fill_parent"
	    android:layout_height="wrap_content"
	    android:text="Button1"
	    android:textSize="32px"
	    />
   :
  (中略)
   :
    </LinearLayout>
</ScrollView>
これだけでスクロールバーに対応した画面を作ることができます。
スクロールバーをカスタマイズ
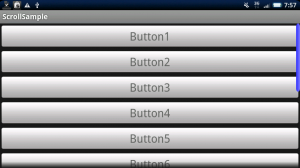
スクロールバーの見た目を変えることができます。
たとえば/drawable/scrollbar_thumb.xmlというファイルを作成し、以下のように記述します。
<shape xmlns:android="http://schemas.android.com/apk/res/android">
    <gradient android:startColor="#3333FF" android:endColor="#8080FF"
            android:angle="0"/>
    <corners android:radius="6dp" />
</shape>
このxmlファイルを以下のような形でScrollViewから指定します。
<ScrollView xmlns:android="http://schemas.android.com/apk/res/android"
    android:layout_width="fill_parent"
    android:layout_height="wrap_content"
    android:scrollbarThumbVertical="@drawable/scrollbar_thumb">
こうすることで、グラデーションのかかったカラーバーを作ることができます。
One Comment


