AnimationDrawableでアニメーションを作る
AnimationDrawableを使うと、XMLでリソースを用意するだけで簡単にアニメーションが作成できます。

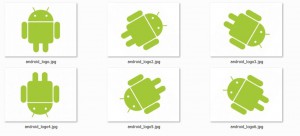
画像を事前に用意します。今回は6枚の画像を(android_logo,1~5.jpgを)連続表示して回転しているように見えるアニメーションを作成します。
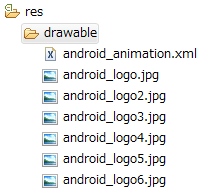
リソースの登録は通常通り、Drawableに追加します(パラパラマンガのようになります)
今回はXMLでアニメーションの設定を行うのでDrawableの下にxmlも一緒に配置します

XMLリソースの設定
/res/drawable/android_animation.xml
<animation-list xmlns:android="http://schemas.android.com/apk/res/android" android:oneshot="false">
    <item android:drawable="@drawable/android_logo" android:duration="50" />
    <item android:drawable="@drawable/android_logo2" android:duration="50" />
    <item android:drawable="@drawable/android_logo3" android:duration="50" />
    <item android:drawable="@drawable/android_logo4" android:duration="50" />
    <item android:drawable="@drawable/android_logo5" android:duration="50" />
    <item android:drawable="@drawable/android_logo6" android:duration="50" />
 </animation-list>
animation-listにitemを登録します。android:oneshot=”false”なのでリピートONです(true設定で1度のみアニメーションを行います)。また、itemのandroid:durationはミリ秒(ms単位)で指定できます。
animation-listの概要、サンプルコードは続きから。
animation-listの概要
| XML属性 | 説明 |
|---|---|
| android:drawable | drawableリソースへの参照(1フレーム分) |
| android:duration | アニメーションの間隔(ms単位の整数値) |
| android:oneshot | 繰り返し設定(true:1回限り、false:リピート) |
| android:variablePadding | trueであれば選択状態に基づいてアニメーションを開始する |
| android:visible | 初期表示状態 |
サンプルコード
    @Override
    public void onWindowFocusChanged(boolean hasFocus) {
     super.onWindowFocusChanged(hasFocus);

     ImageView img = (ImageView)findViewById(R.id.ImageView01);
     // AnimationDrawableのXMLリソースを指定
     img.setBackgroundResource(R.drawable.android_animation);

     // AnimationDrawableを取得
     AnimationDrawable frameAnimation = (AnimationDrawable) img.getBackground();

     // アニメーションの開始
     frameAnimation.start();
    }
サンプルコードもとてもシンプルです。XMLリソースをImageViewのBackgroundリソースとして読み込み、AnimationDrawableとして取り出しています(5~10行目)
注意すべきはAnimationDrawable#start()メソッドはonCreateでは有効にならないことです(アニメーションしません)。onWindowFocusChanged等準備完了後に呼び出す必要があります。
2 Comments