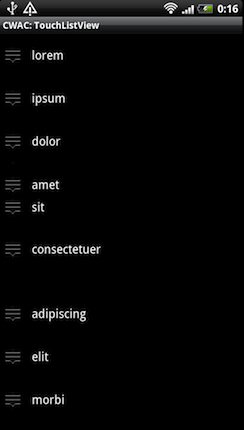
Androidに標準で用意されているListViewはデータを一覧表示する場合に多用されます。
リストのソート自体はリストを再作成することで可能ですが、直感的にドラッグアンドドロップで操作できると便利だしかっこいいと思いませんか?
今回はこのような直感的にリストの要素を入れ替えることができるListViewが簡単に実装できるライブラリを紹介します。
詳細は以下から。
ドラッグアンドドロップでリストの要素を移動させるためのライブラリとしてCWAC TouchListViewがあります。
またこのライブラリは要素をドラッグしてスライドさせることで要素を削除する機能も提供しています。
※このライブラリのライセンスはApache Software License 2.0ですので使用する際にはプロジェクトへのライセンスファイルの同梱が必要になります。
今回はこのライブラリを使用してリストの要素を移動させることができるListViewを実装してみましょう。
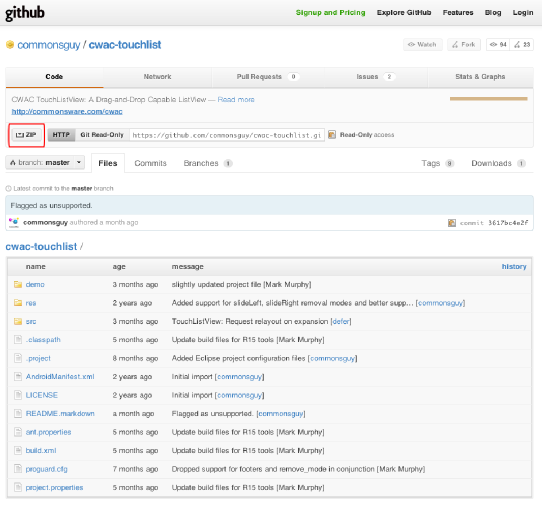
CWAC TouchListViewのダウンロード
CWAC TouchListViewはgithubからダウンロードすることができます。
https://github.com/commonsguy/cwac-touchlist
まずは上記URLからサンプルとライブラリ本体が格納されているZIPファイルを取得しましょう。
ページ上部のZIPというボタンを押下するとダウンロードが開始されます。
ダウンロードが完了したらZIPを解凍します。
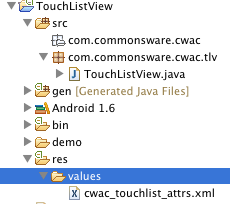
まずは解凍したフォルダをeclipseでインポートしてみましょう。
上図のTouchListView.javaがライブラリの本体になります。
CWAC TouchListViewを取り込む
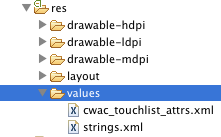
CWAC TouchListViewはTouchListView.javaとres/values配下のcwac_touchlist_attrs.xmlをコピーするだけで使用することができます。
今回はこの記事のサンプルのorg.techbooster.sample.dragdroplist.tlv配下にTouchListView.javaを格納します。
cwac_touchlist_attrs.xmlはres/values配下に格納します。
レイアウトに配置する
まずはTouchListViewをレイアウトに配置します。
main.xml
<?xml version="1.0" encoding="utf-8"?>
<LinearLayout xmlns:android="http://schemas.android.com/apk/res/android"
    android:layout_width="fill_parent"
    android:layout_height="fill_parent"
    android:orientation="vertical" >

    <org.techbooster.sample.dragdroplist.tlv.TouchListView
        xmlns:android="http://schemas.android.com/apk/res/android"
        xmlns:tlv="http://schemas.android.com/apk/res/org.techbooster.sample.dragdroplist"
        android:id="@android:id/list"
        android:layout_width="fill_parent"
        android:layout_height="fill_parent"
        android:drawSelectorOnTop="false"
        tlv:expanded_height="128dip"
        tlv:grabber="@+id/icon"
        tlv:normal_height="64dip"
        tlv:remove_mode="slideRight" />

</LinearLayout>
7行目はTouchListViewを宣言しています。
TouchListView.javaが格納されているパッケージのフルパス+TouchListViewで指定します。
9行目はTouchListViewを使用するアプリケーションのルートパッケージ名を指定しています。
14行目はリストの要素を移動させる時に開く要素と要素の間の幅を指定します。
1要素に入れるViewの量によってこの値を調節する必要があります。
15行目はドラッグ操作をする場合にタップするアイコンのリソースを設定しています。
16行目は1要素の高さを指定しています。
1要素に入れるViewの量によってこの値を調節する必要があります。
17行目は要素を削除する場合のアクションを指定します。
アクションの種類は以下の表を参考にしてください。
要素のレイアウトを作成する
リストの要素1個分のレイアウトを作成しましょう。
row2.xml
<?xml version="1.0" encoding="utf-8"?>
<RelativeLayout xmlns:android="http://schemas.android.com/apk/res/android"
    android:layout_width="fill_parent"
    android:layout_height="64dip"
    android:gravity="center_vertical"
    android:ignoreGravity="@+id/icon" >

    <ImageView
        android:id="@+id/icon"
        android:layout_width="wrap_content"
        android:layout_height="wrap_content"
        android:layout_alignParentBottom="true"
        android:layout_alignParentLeft="true"
        android:layout_alignParentTop="true"
        android:src="@drawable/grabber" />

    <TextView
        android:id="@+id/label"
        android:layout_width="wrap_content"
        android:layout_height="wrap_content"
        android:layout_alignWithParentIfMissing="true"
        android:layout_centerVertical="true"
        android:layout_toRightOf="@id/icon"
        android:ellipsize="marquee"
        android:paddingLeft="9dip"
        android:singleLine="true"
        android:textAppearance="?android:attr/textAppearanceMedium" />

</RelativeLayout>
ImageViewはドラッグを行う際に使用する領域のイメージです。
特筆すべきは全体のheightをtlv:normal_heightとあわせる必要があることです。
要素1個全体のheight = tlv:normal_heightですので、合わせない場合はレイアウトが崩れてしまいます。
実装する
では実際にソース上で要素の格納と削除、移動の動作を実装していきましょう。
実装の順番としては、
- アダプターの作成
- DropListenerの実装
- RemoveListenerの実装
- TouchListViewのインスタンス化
となります。
アダプターの作成
ここでは内部クラスとしてアダプターを作成します。
汎用的に使用したい場合は外部クラスとして定義しましょう。
DragDropListSampleActivity.java
class IconicAdapter extends ArrayAdapter<String> {
        IconicAdapter() {
            super(DragDropListSampleActivity.this, R.layout.row2, array);
        }

        public View getView(int position, View convertView,
                ViewGroup parent) {
            View row = convertView;

            if (row == null) {
                LayoutInflater inflater = getLayoutInflater();

                row = inflater.inflate(R.layout.row2, parent, false);
            }

            TextView label = (TextView) row.findViewById(R.id.label);

            label.setText(array.get(position));

            return (row);
        }
    }
内容としてはArrayAdapterクラスを継承したクラスになります。
getViewメソッドをオーバーライドすることで独自のレイアウトを定義しています。
詳細はこちらを参考にしてください。
DropListenerの実装
DropListenerはリストの要素を移動させた場合に呼ばれるリスナーです。
このリスナーの中ではデータの中身を移し替える処理を実装します。
また入れ替えた並び順を保存したい場合は保存用の処理をこの中に入れましょう。
DragDropListSampleActivity.java
private TouchListView.DropListener onDrop = new TouchListView.DropListener() {
        @Override
        public void drop(int from, int to) {
            String item = adapter.getItem(from);

            adapter.remove(item);
            adapter.insert(item, to);
        }
    };
RemoveListenerの実装
RemoveListenerはリストの要素を削除する場合に呼ばれるリスナーです。
このリスナーの中ではデータの削除処理を実装します。
DragDropListSampleActivity.java
private TouchListView.RemoveListener onRemove = new TouchListView.RemoveListener() {
        @Override
        public void remove(int which) {
            adapter.remove(adapter.getItem(which));
        }
    };
TouchListViewのインスタンス化
上記の前準備が完了するとTouchListViewをインスタンス化することができます。
特別な処理は必要なく、標準のListViewと同じ感覚でインスタンス化することができます。
DragDropListSampleActivity.java
private IconicAdapter adapter = null;
    private ArrayList<String> array = new ArrayList<String>(Arrays.asList(items));

    @Override
    public void onCreate(Bundle icicle) {
        super.onCreate(icicle);
        setContentView(R.layout.main);

        TouchListView tlv = (TouchListView) getListView();
        adapter = new IconicAdapter();
        setListAdapter(adapter);

        tlv.setDropListener(onDrop);
        tlv.setRemoveListener(onRemove);
    }
特筆すべきはリスナーの登録部分です。
13行目では移動の処理を行うDropListenerのインスタンスを登録しています。
14行目では削除の処理を行うRemoveListenerのインスタンスを登録しています。