コントロールにアニメーションを追加する その2(WP7)
アプリケーションのUIにアニメーションを追加する方法を前回に引き続き紹介していきます。
前回は、アニメーションの基本としてアニメーションオブジェクトにあたる「ColorAnimation」「DoubleAnimation」「ColorAnimation」とStoryboardの使い方を紹介しました。
※前回の記事はこちら
本エントリでは、もう少し複雑なアニメーションを紹介します。
前回紹介したアニメーションオブジェクトはBy(変化量)プロパティを指定できたように、アニメーションの終了値まで一定量ずつ変化するアニメーションでした。
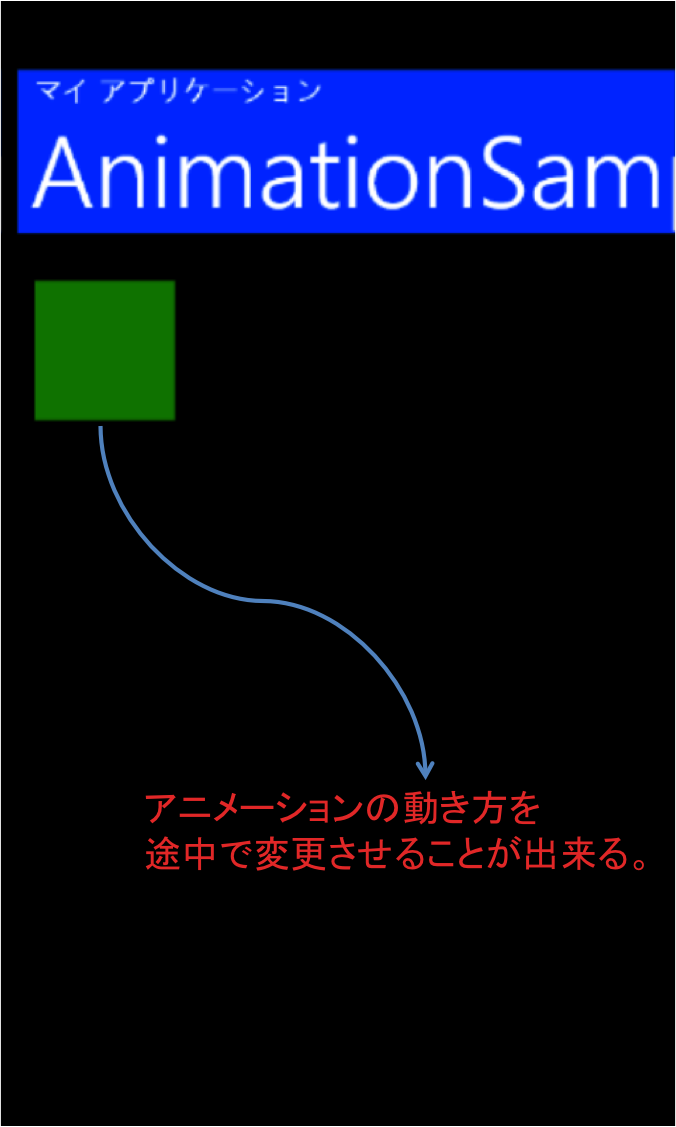
今回紹介するKeyFrameを使ったアニメーションを利用すると、変化の仕方を指定でき、アニメーションに緩急をつけることができます。
それでは、詳細はつづきでどうぞ
KeyFrameを利用したアニメーション
アニメーションを利用する為のクラスには、KeyFrameを指定することができるDoubleAniationUsingKeyFrames、ColorAnimationUsingKeyFramesクラス等が用意されています。
KeyFrameとは、アニメーションを構成するフレームの内、変化点となるFrameのことを指します。
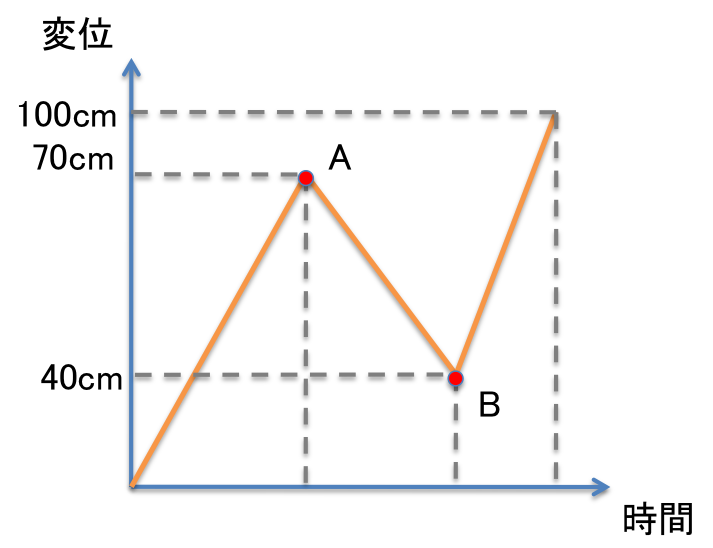
たとえば、四角のオブジェクトが横方向に100cm移動するアニメーションを考えましょう。
KeyFrameを指定しない場合には、100cmを真っ直ぐ進むアニメーションになりますが、KeyFrameを指定することで70cm進み30cm戻り60cm進むといったアニメーションを作成することができます。
上図の場合のAやBがKeyFrameにあたり、次のKeyFrameまでどのように変化するのかを指定します。
KeyFrameに指定できる、「Linear(比例関数)」「Discrete(ガウス関数)」「Spline(ベジェ曲線)」「Easing(任意の関数指定)」の4つの変化の仕方のうち「Linear」「Discrete」を具体的に紹介していきます。(括弧の内はイメージとなる関数や曲線名)
※SplineとEasingについては次回の「Blendを利用したアニメーションの作成」で触れたいと思います。
LinearKeyFrameを利用する
KeyFrameはDouble/Color/Point等、アニメーションを行う要素ごとに専用のクラスが設けられています。
LinearKeyFrameの場合には、LinearDoubleKeyFrameやLinearColorKeyFrameとなります。
■LinearKeyFrame
[table “227” not found /]
■DiscreteKeyFrame
[table “228” not found /]
■SplineKeyFrame
[table “229” not found /]
それぞれのKeyFrameには「KeyTime」と「Value」プロパティを設定する必要があります。
[table “226” not found /]先ほど例に挙げた、「四角形のオブジェクト(Rectangle)が70進み30戻り60進むアニメーション」は以下の様になります。
※横方向の1マスを4pxとして計算しています。
            <Rectangle Fill="Green" Height="50" Width="50" Margin="12,6,344,502">
                <Rectangle.Resources>
                    <Storyboard x:Name="DoubleAnimationBoard">
                        <DoubleAnimationUsingKeyFrames Storyboard.TargetName="RectanglePosition" Storyboard.TargetProperty="X" Duration="0:0:9">
                            <LinearDoubleKeyFrame KeyTime="0:0:3" Value="280" />
                            <LinearDoubleKeyFrame KeyTime="0:0:6" Value="120" />
                            <LinearDoubleKeyFrame KeyTime="0:0:9" Value="400" />
                        </DoubleAnimationUsingKeyFrames>
                    </Storyboard>
                </Rectangle.Resources>

                <Rectangle.RenderTransform>
                    <TranslateTransform x:Name="RectanglePosition" X="0" Y="0" />
                </Rectangle.RenderTransform>
            </Rectangle>
4行目で利用している、「DoubleAnimationUsingKeyFrames」がKeyFrameを利用する場合に使用するクラスになります。
KeyFrameの要素はAnimationUsingKeyFramesのタグの内側に書きます。
5行目~7行目がKeyFrameの値になります。
それぞれ3秒目6秒目9秒目でXの値がどうなっているかを指定しています。
DiscreteDoubleKeyFrameを利用する
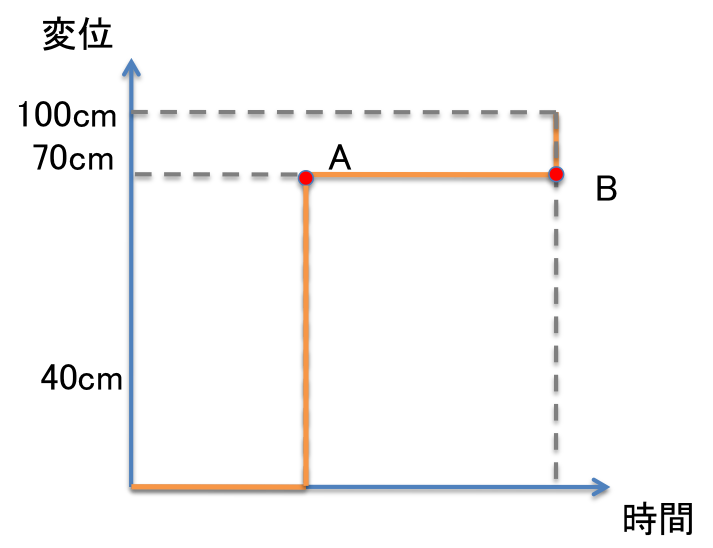
DiscreteKeyFrameはガウス関数の様に、KeyTimeで指定した値になるまで一切Valueを変化させず、急な変化を行います。
以下ソースコードは、(0,0)(200,0)(200,200)(0,200)の順に四角形のオブジェクトが移動するサンプルです。
急な変化を行うため、オブジェクトはワープしたかのようにアニメーションします。
            <Rectangle Fill="Green" Height="100" Width="100" Margin="12,6,344,502">
                <Rectangle.Resources>
                    <Storyboard x:Name="DoubleAnimationBoard">
                        <DoubleAnimationUsingKeyFrames Storyboard.TargetName="RectanglePosition" Storyboard.TargetProperty="X" Duration="0:0:4">
                            <DiscreteDoubleKeyFrame KeyTime="0:0:1" Value="0" />
                            <DiscreteDoubleKeyFrame KeyTime="0:0:2" Value="200" />
                            <DiscreteDoubleKeyFrame KeyTime="0:0:3" Value="200" />
                            <DiscreteDoubleKeyFrame KeyTime="0:0:4" Value="0" />
                        </DoubleAnimationUsingKeyFrames>
                        <DoubleAnimationUsingKeyFrames Storyboard.TargetName="RectanglePosition" Storyboard.TargetProperty="Y" Duration="0:0:4">
                            <DiscreteDoubleKeyFrame KeyTime="0:0:1" Value="0" />
                            <DiscreteDoubleKeyFrame KeyTime="0:0:2" Value="0" />
                            <DiscreteDoubleKeyFrame KeyTime="0:0:3" Value="200" />
                            <DiscreteDoubleKeyFrame KeyTime="0:0:4" Value="200" />
                        </DoubleAnimationUsingKeyFrames>
                    </Storyboard>
                </Rectangle.Resources>

                <Rectangle.RenderTransform>
                    <TranslateTransform x:Name="RectanglePosition" X="0" Y="0" />
                </Rectangle.RenderTransform>
            </Rectangle>
5~8行目、11~14行目でそれぞれX座標Y座標を設定しています。
このように、Storyboardに複数個のプロパティに対するアニメーションを置くことでいくつかのプロパティを同時に変化させることも可能です。
サンプルではX座標とY座標を同時に変更しています。
以上今回は、KeyFrameを使ったアニメーションの紹介でした。
次回ご紹介するBlendを利用したアニメーションの作成では、MS Blendを使って今回紹介出来なかったSplineアニメーションについて主に紹介したいと思います。


