ラジオボタンで複数の選択肢から1つを選択させる / Getting Started
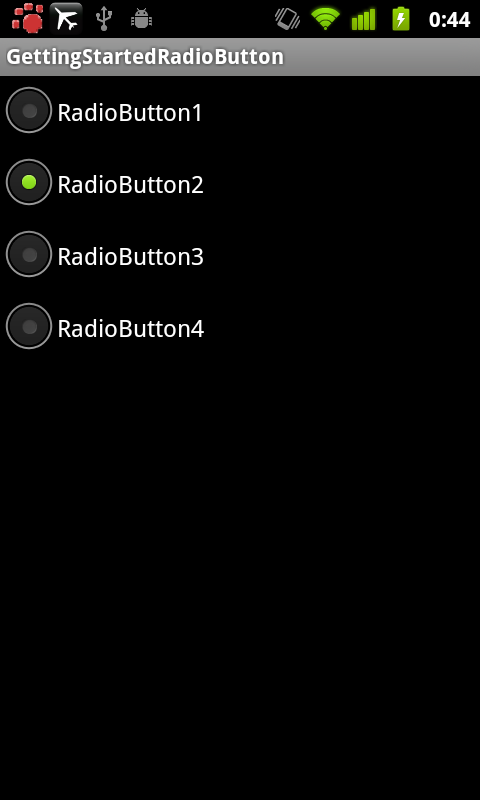
アンケートや設定する項目の選択などで複数の選択肢の中から1つを選択するラジオボタンがAndroidでも用意されています。
アプリケーションの設定をユーザーに行ってもらう場合には欠かせません。
ラジオボタンを利用するのに必要なクラス/インタフェースは以下の3つです。
ラジオボタンを利用する際に必要なクラス
| クラス/インタフェース | 説明 |
|---|---|
| RadioButton | それぞれの項目に相当するクラス |
| RadioGroup | 複数のRadioButtonを持つ。それらのRadioButtonのうち、1つだけが選択することが可能 |
| OnCheckedChangeListener | 選択されている項目が変わった時にonCheckedChangedメソッドで通知を受ける |
RadioGroupクラスで重要なメソッドは以下の通りです。
RadioGroupクラスの重要なメソッド
| メソッド | 説明 |
|---|---|
| void check(int id) | 引数で指定したラジオボタンを選択する |
| int getCheckRadioButtonId() | 選択中のラジオボタンのIDを取得する |
| void clearCheck() | 選択を解除する |
それでは続きで説明していきます。
RadioGroupクラスとRadioButtonクラスの関係
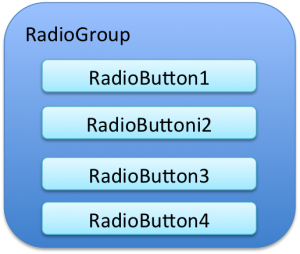
ラジオボタンは前述の通りRadioGroupクラスとRadioButtonクラスを利用します。RadioGroupクラスは1つ以上(実際には2つ以上の項目の中から選択するため利用するので2つ以上)のRadioButtonクラスを持ちます。
レイアウトファイルでは以下のように記述します。
<RadioGroup android:layout_height="wrap_content"
    android:layout_width="wrap_content"
    android:id="@+id/RadioGroup">
    <RadioButton android:text="1"
        android:id="@+id/RadioButton1"
        android:layout_height="wrap_content"
        android:layout_width="wrap_content">
        </RadioButton>
    <RadioButton android:text="2"
        android:id="@+id/RadioButtoni2"
        android:layout_width="wrap_content"
        android:layout_height="wrap_content">
        </RadioButton>
    <RadioButton android:text="3"
        android:id="@+id/RadioButton3"
        android:layout_width="wrap_content"
        android:layout_height="wrap_content">
        </RadioButton>
    <RadioButton android:text="4"
        android:id="@+id/RadioButton4"
        android:layout_width="wrap_content"
        android:layout_height="wrap_content">
        </RadioButton>
</RadioGroup>
複数のRadioButtonGroupを利用する
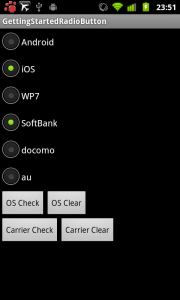
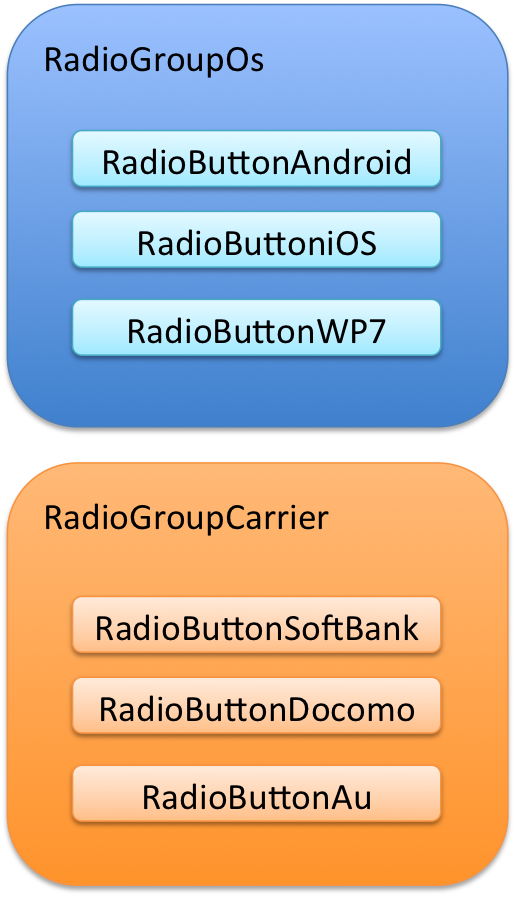
もちろん複数のRadioGroupを利用することもできます。サンプルではモバイル端末のOSとキャリアを選択するラジオボタンを作成してみます。つまり2つのRadioGroupが存在し、それぞれの項目としてRadioButtonを持つことになります。
■res/layout/main.xml
<RadioGroup android:layout_height="wrap_content"
	    android:layout_width="wrap_content"
	    android:id="@+id/RadioGroupOs">
	    <RadioButton android:text="Android"
	        android:id="@+id/RadioButtonAndroid"
	        android:layout_height="wrap_content"
	        android:layout_width="wrap_content">
	        </RadioButton>
	    <RadioButton android:text="iOS"
	        android:id="@+id/RadioButtoniOS"
	        android:layout_width="wrap_content"
	        android:layout_height="wrap_content">
	        </RadioButton>
	    <RadioButton android:text="WP7"
	        android:id="@+id/RadioButtonWP7"
	        android:layout_width="wrap_content"
	        android:layout_height="wrap_content">
	        </RadioButton>
	</RadioGroup>
	<RadioGroup android:layout_height="wrap_content"
	    android:layout_width="wrap_content"
	    android:id="@+id/RadioGroupCarrier">
	    <RadioButton android:text="SoftBank"
	        android:id="@+id/RadioButtonSoftBank"
	        android:layout_height="wrap_content"
	        android:layout_width="wrap_content">
	        </RadioButton>
	    <RadioButton android:text="docomo"
	        android:id="@+id/RadioButtonDocomo"
	        android:layout_width="wrap_content"
	        android:layout_height="wrap_content">
	        </RadioButton>
	    <RadioButton android:text="au"
	        android:id="@+id/RadioButtonAu"
	        android:layout_width="wrap_content"
	        android:layout_height="wrap_content">
	        </RadioButton>
	</RadioGroup>
選択された項目に変化があったことを知る
ラジオボタンが選択された項目が変わったことを知るにはRadioGroupクラスのsetOnCheckedChangeListenerメソッドでOnCheckedChangeListenerインタフェースを登録します。サンプルソースでは8行目と11行目で2つのRadioGroupクラスのインスタンスにそれぞれ登録しています。
選択されるとonCheckedChangedメソッドが呼び出されます。引数には選択されたRadioButtonクラスを含むRadioGroupクラスと、選択されたRadioButtonのIDが渡ってきます。clearCheckメソッドが呼ばれた場合には何も選択されていない状態を示す-1がIDとして渡ってきます。
■src/MainActivity.java
    @Override
    public void onCreate(Bundle savedInstanceState) {
        super.onCreate(savedInstanceState);
        setContentView(R.layout.main);

        // RadioGroupをメンバ変数に保存しておく
        mRadioGroupOs = (RadioGroup)findViewById(R.id.RadioGroupOs);
        mRadioGroupOs.setOnCheckedChangeListener(this);

        mRadioGroupCarrier = (RadioGroup)findViewById(R.id.RadioGroupCarrier);
        mRadioGroupCarrier.setOnCheckedChangeListener(this);
〜省略〜
    }

    @Override
    public void onCheckedChanged(RadioGroup group, int checkedId) {
        // どれも選択されていなければidには-1が入ってくる
        if (-1 == checkedId) {
            Toast.makeText(MainActivity.this,
                    "クリアされました",
                    Toast.LENGTH_SHORT).show();
        } else {
            Toast.makeText(MainActivity.this,
                    ((RadioButton)findViewById(checkedId)).getText()
                        + "が選択されました",
                    Toast.LENGTH_SHORT).show();
        }
   }
選択されている項目を取得する
上記の方法でリスナを登録することでonCheckedChangedメソッドで選択されたタイミングでどのRadioButtonが選択されたか知ることができました。しかし、複数の設定項目を選択してもらい、決定ボタンが押された時に一度に反映するために改めて選択状況を確認したい時もあります。
その場合にはRadioGroupクラスのgetCheckedRadioButtonIdメソッドを利用します。戻り値でそのRadioGroup内の選択されているRadioButtonを得ることができます。onCheckedChangedメソッドと同様に何も選択されていない場合には-1が返ってきます。
■src/MainActivity.java
// 選択されているRadioButonのIDを取得する
// どれも選択されていなければgetCheckedRadioButtonIdは-1が返ってくる
// radioGroupは確認しようとしているRadioGroupクラス(RadioGroupOsかRadioGroupCarrier)
int checkedId = radioGroup.getCheckedRadioButtonId();
if (-1 != checkedId) {
    Toast.makeText(MainActivity.this,
            ((RadioButton)findViewById(checkedId)).getText()
                + "が選択されています",
            Toast.LENGTH_SHORT).show();
} else {
    Toast.makeText(MainActivity.this,
            "何も選択されていません",
            Toast.LENGTH_SHORT).show();
}
break;
まとめ
AndroidではRadioGroupクラスとRadioButtonクラスでラジオボタンを利用することができ、OnCheckedChangeListenerインタフェースのOnCheckedChangedメソッドかRadioGroupクラスのgetCheckedRadioButtonIdメソッドで選択されている項目(RadioButton)を取得します。
以上、Androidでラジオボタンを利用する方法でした。お疲れさまです。


